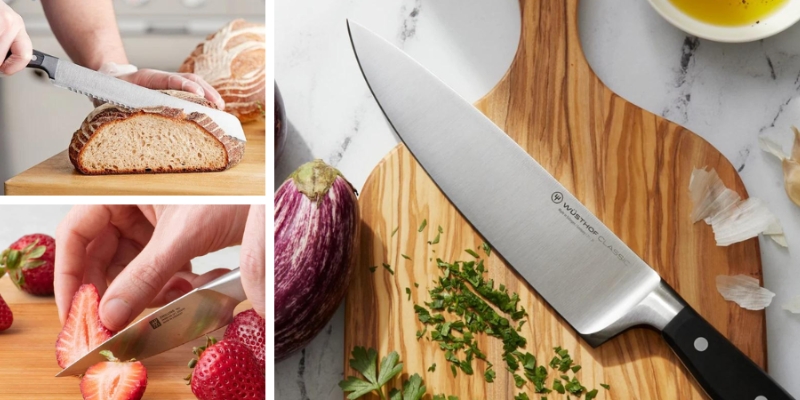
If you cook regularly, you’ve probably noticed how quickly a knife can go from “cuts everything” to “why am I fighting with this thing?” A dull knife makes simple jobs annoying. Tomatoes get crushed instead of sliced. Onions take forever to chop. Even cutting a potato can start to feel like hard work.
And there’s a safety issue, too. When a knife doesn’t cut properly, we tend to push harder. The blade can slip, and that’s when fingers get into trouble. The reassuring news is that you usually don’t need to replace a knife just because it has stopped cutting well. Often, it simply needs a proper sharpening.
Don’t worry if you’ve never sharpened a kitchen knife before. It looks a little intimidating at first, but the basic idea is actually pretty simple.
What’s the Best Way to Sharpen a Kitchen Knife?
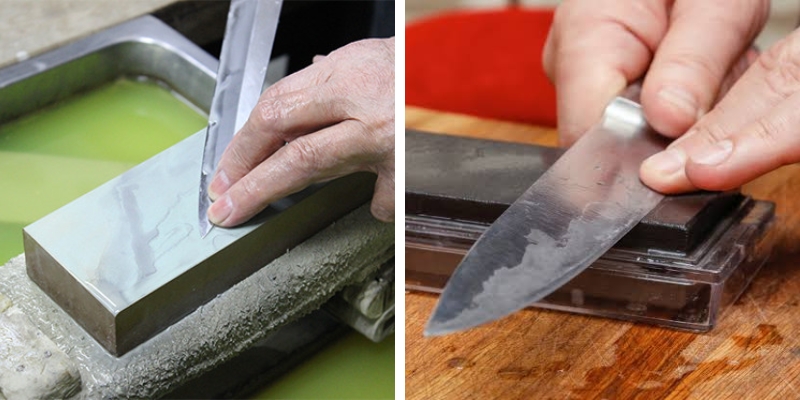
For a high-quality kitchen knife, you should choose a whetstone. It takes more practice than a pull-through sharpener, but you have much more control over the edge. You can choose the angle, control the pressure, and avoid taking off more metal than necessary.
The basic process is:
- Position the whetstone as indicated.
- Set it on something solid so it won’t move around.
- Maintain the angle of the knife.
- Move the blade across the stone from heel to tip.
- Work one side until you can feel a small burr.
- Repeat on the reverse side.
- Use a finer stone if you want to refine the edge.
- Clean and dry the knife.
That sounds simple, and it is. The tricky part is keeping your angle steady. That’s something you’ll get better at with practice. If you’re completely new to sharpening, a pull-through sharpener can be easier to start with. It won’t give you the same level of control as a whetstone, but it can be convenient for an inexpensive everyday knife.
Why Does a Sharp Knife Make Such a Difference?
You really notice the difference when you sharpen a knife that has been dull for months. Take a tomato, for example. With a dull knife, you might press down hard enough to crush the tomato before the blade gets through the skin.
With a sharp knife, the blade catches the skin and slices through it with very little pressure. The same goes for herbs, onions, peppers, meat, and just about everything else you prepare in the kitchen.
A sharp knife can give you the following:
- Cleaner cuts
- More control
- Less effort while chopping
- More even slices
- Less crushing and tearing
How Can You Tell If Your Knife Is Dull?
You don’t need special equipment to figure this out. Just pay attention the next time you cook. Your knife may need sharpening if:
It slides across tomato skin instead of cutting it.
- You have to press hard to get through vegetables.
- It crushes herbs instead of chopping them.
- The blade keeps slipping when you begin a cut.
- Chopping seems a whole lot harder than it used to
- The knife leaves rough, uneven cuts.
The paper test can also give you a quick indication. If the knife struggles to cut through a sheet of paper cleanly, the edge probably needs attention. Still, I wouldn’t obsess over the paper test. How the knife behaves when you’re actually cooking is more useful.
Different Ways to Sharpen a Kitchen Knife
There’s more than one way to sharpen a knife. The right choice depends on your knife, your budget, and how much effort you want to put into learning the process.
Whetstone: A whetstone is the method I’d recommend if you want to learn proper knife sharpening. The nice thing about a stone is that you’re in control. You can sharpen slowly and remove only the amount of metal you need.
The good part
- Excellent control
- Works with most kitchen knives
- Can produce a very sharp edge
- Good for maintaining quality knives
- Lets you work with different grits
The downside
- Takes some practice
- You need to learn the correct angle
- It takes longer than using a pull-through sharpener
Don’t expect your first attempt to be perfect. Most beginners wobble the blade a little. That’s normal. After a few sessions, the motion starts to feel much more natural.
How to Sharpen a Kitchen Knife With a Whetstone
This is the part that seems complicated when you first watch someone do it. Once you understand what you’re trying to accomplish, it makes much more sense.
1. Get the Stone Ready: First, check what kind of whetstone you have. Some water stones need to soak before you use them. Others only need water on the surface, and some modern stones shouldn’t be soaked at all.
So don’t automatically put every stone in a bowl of water. Follow the instructions that came with yours. Put the stone on a stable surface. If it slides around while you’re sharpening, stop and fix that first. A damp kitchen towel or nonslip mat underneath can help.
2. Find Your Angle: The sharpening angle matters, but you don’t need to become obsessed with measuring it down to the last degree. Many Japanese-style knives are sharpened around 15 degrees per side, while many Western kitchen knives fall somewhere around 15–20 degrees per side. If the knife manufacturer gives you a recommended angle, follow that.
For beginners, the bigger challenge is simply keeping the angle consistent. One trick is to imagine that you’re holding a small wedge between the blade and the stone. Keep that distance roughly the same as you move the knife.
3. Start Sharpening: Place the heel of the blade on the stone. Move the knife across the stone toward the tip, keeping the same angle as you go. Use light pressure. You don’t have to push down hard.
Imagine that you’re trying to shave a very thin layer from the stone. That mental picture helps keep the motion smooth. Work your way along the entire edge rather than concentrating on one small section.
4. Look for a burr: This is the part that tells you the sharpening is actually reaching the edge. As you sharpen one side, a tiny raised edge of metal forms on the opposite side. This is called a burr.
You can carefully check for it by moving your finger from the spine toward the edge. Don’t run your finger along the cutting edge.
Once you can feel a burr from the heel all the way to the tip, you know you’ve reached the edge. You don’t need to keep grinding away after that. More sharpening isn’t automatically better.
5. Do the Other Side: Turn the knife over and work on the other side. Try to keep the same angle and use similar strokes. You don’t have to count every stroke perfectly. Feeling for the burr is more useful than trying to hit an exact number.
6. Use a Finer Stone: If you started with a coarse or medium stone, you can move to a finer grit to clean up and refine the edge. Something around 3000–6000 grit can give the edge a smoother finish.
For everyday cooking, though, you don’t necessarily need an extremely high grit. A well-sharpened edge from a medium stone can work beautifully.
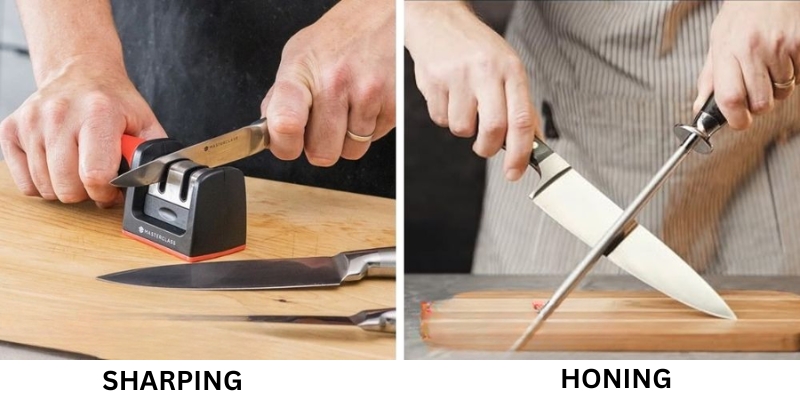
7. Clean the Knife: Once you’re finished, clean the blade according to the manufacturer's recommendations and dry it immediately. Be careful here. The knife may be considerably sharper than you expect. Honing and Sharpening Aren’t the Same Thing. This confuses a lot of people.
Pull-Through Sharpener: If the thought of using a whetstone makes you nervous, a pull-through sharpener is much less complicated. You place the blade into the slot and pull it through. That’s basically it.
They’re handy when you want a quick result without learning much technique. The drawback is that some models remove more metal than necessary. That isn’t a huge concern with a cheap everyday knife, but I’d be more careful with an expensive Japanese knife or a blade with a very thin edge. Electric Knife Sharpener
Electric sharpeners: Electric sharpeners are another convenient option. They’re fast and usually keep the blade at a consistent angle. If you have several kitchen knives that need regular maintenance, an electric sharpener can save time.
The main thing is not to overdo it. If the knife is already sharp, repeatedly running it through the sharpening stages just because you can may remove more material than necessary. Follow the instructions for the particular sharpener you own.
How Often Should You Sharpen a Kitchen Knife?
There’s no need to put sharpening on a strict calendar. Some people cook every day. Others pull out their chef’s knife twice a week. Naturally, those knives won’t need sharpening at the same rate.
For many home cooks, sharpening every few months is a reasonable starting point. If you cook heavily, you may need to do it more often.
The easiest approach is to pay attention to the knife. When you start thinking, “Why is this thing not cutting anymore?” it’s probably time.
Common Sharpening Mistakes
A few small mistakes can make sharpening harder than it needs to be.
Changing the angle: This is probably the biggest one. If you start at one angle and gradually lift or lower the blade during each stroke, you won’t get an even edge.
Using too much pressure: You don’t need to attack the stone. Heavy pressure can make it harder to control the blade and can remove more steel than necessary.
Stopping too soon: If you haven’t reached the actual edge, you haven’t really sharpened the knife yet. Look for that burr before moving on.
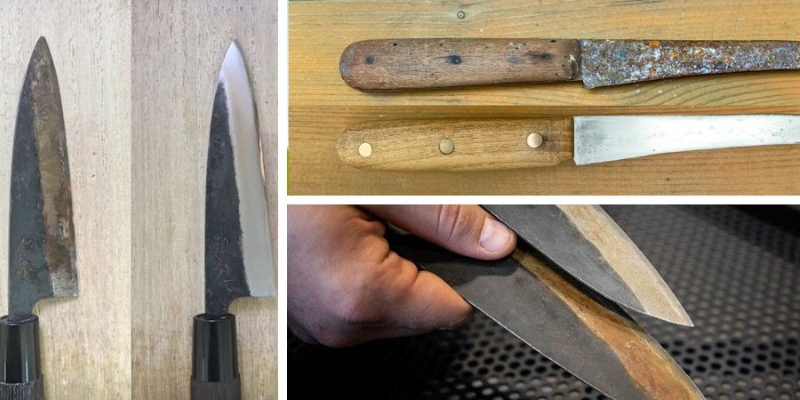
Using a very coarse stone for routine sharpening: Coarse stones have their place, especially when repairing damaged edges. But you don’t need to remove a lot of metal every time your knife feels slightly dull. Sharpening a damaged knife
A sharpening stone can fix a dull edge. It can’t make a cracked blade safe. If the knife has serious structural damage, replacement may be the smarter option.
Putting the knife in the dishwasher: Even a well-sharpened knife won’t stay that way for long if you constantly put it through the dishwasher. Heat, detergent, movement, and contact with other utensils are all hard on kitchen knives. Hand-wash and dry good knives instead.
How to Keep a Kitchen Knife Sharp
Once you’ve gone through the trouble of sharpening a knife, you probably don’t want to do it again next week. A few simple habits can help.
Use a decent cutting board. Wood and suitable plastic boards are generally much kinder to knife edges than glass, ceramic, or stone. Don’t use your chef’s knife for jobs it wasn’t designed for. Opening packages, cutting through bones, or scraping food around the cutting board with the edge can all damage it.
When you need to move chopped food, turn the knife over and use the **back of the blade** instead of dragging the cutting edge across the board.
And give the knife its own storage space. A knife block, magnetic strip, or blade guard can keep the edge from banging into other utensils in a drawer. Frequently Asked Questions
Frequently Asked Questions
What is the best way to sharpen a kitchen knife?
For most quality kitchen knives, a whetstone is a great choice because it gives you control over the angle and the amount of metal you remove. It takes some practice, but you can get very good results at home.
Can you sharpen a kitchen knife without a whetstone?
Yes, a pull-through sharpener or electric sharpener can work, and you can also have your knives professionally sharpened. A whetstone gives you more control over the process.
How long does it take to sharpen a kitchen knife?
Once you know what you’re doing, a normal sharpening session might take around 10–20 minutes. A badly neglected knife can take longer. There’s no benefit to rushing. Take your time and concentrate on keeping the angle steady.
Can a kitchen knife be too sharp?
A properly sharpened knife isn’t “too sharp” simply because it cuts extremely well. In fact, a sharp knife usually needs less force than a dull one. That doesn’t mean you should become careless with it. Store it properly and keep your fingers out of the blade’s path.
Should I sharpen or replace my kitchen knife?
If the knife has a sound blade and a secure handle, try sharpening it first. If you’re dealing with a cracked blade, deep corrosion, severe damage, or a handle that can’t be safely repaired, replacement makes more sense. Final Thoughts
Final Thoughts
Learning to sharpen a kitchen knife is one of those skills that seems difficult until you actually try it. You probably won’t produce a perfect edge the first time. That’s okay. The more important thing is learning to keep the blade at a steady angle, use reasonable pressure, and recognize when you’ve reached the edge.
For a good knife, I’d learn to use a whetstone. If you mainly want something quick and simple, a pull-through or electric sharpener may be more practical.
And don’t wait until your knife is practically useless before sharpening it. A little regular maintenance is much easier than rescuing a blade that you have neglected for years. After you get used to cooking with a properly sharpened knife, you will feel the difference every time you cut a tomato or chop an onion or cut up vegetables for dinner.